
The Expressif ESP8266 is THE inexpensive IoT platform for makers and professional IoT developers. Over 100 million ESP chips have been sold.
What makes the ESP8266 family so special? Why should you bother with it? The answer is: it has WiFi, a capable processor, great development options, great support, and finally, PRICE. All the Expressif SOCs (System On a Chip) are available on boards costing under $10 US in 2018.
The Expressif ESP family of SOCs launched a revolution in low cost WiFi development boards.
In 2014 Expressif released the ESP8266EX a SOC combining processor and WiFi in a low cost package. In 2016 the more powerful ESP32, adding Bluetooth, was released. A lower cost version of the ESP8266EX, the ESP8285 with 1MB of integrated flash was also released in 2016. A wide variety of development languages and environments support the ESP family: C/C++, Python, LUA, Arduino, MicroPython, MongooseOS, FreeRTOS. We are only going to be looking at Python for now.

So, how do you choose a Python development board and environment?
We will show you how! It’s easy!
We are only focused on Python, so that eliminates all the other development environments and leaves us with only Micropython and CircuitPython.
Adafruit developed CircuitPython, a variation of MicroPython, focused on supporting Adafruit boards, such as the Circuit Playground, Huzzah32, etc.
You can find out more about Adafruit CircuitPython boards here.
The next criteria is cost. Adafruit makes a great product, but they cost more than a mystery brand board available on ebay or Amazon. Don’t get me wrong I love Adafruit products and CircuitPython. Adafruit has some great low cost boards that support CircuitPython, the Trinket M0 is only $8.95! Unfortunately, the Trinket M0 doesn’t include WiFi. The Adafruit boards provide extra features for that additional cost, built in RGB LEDs, battery connectors, builtin sensors. Details of the differences between MicroPython and CircuitPython can be found here.
So, For “IoT on the Cheap” that leaves us with MicroPython and “generic” ESP boards. We still have three choices of boards based on Expressif chips: ESP8285, ESP8266, and ESP32. To keep costs low support circuitry around the ESP chips is kept to a minimum. The board designs are open source.
| Wemos D1 Mini Lite | HiLetgo ESP8266 NodeMCU | HiLetgo ESP32 NodeMCU | |
| Cost | $4.00 | $6.00 | $10.00 |
| MCU | ESP-8285 | ESP-8266 | ESP-32S |
| ADC | 1 10-Bit | 1 10-Bit | 18 12-Bit |
| GPIO | 11 | 17 | 36 |
| Wifi | Yes | Yes | Yes |
| Bluetooth | No | No | Yes |
| CPU | Xtensa 1 core L106 | Xtensa 1 core L106 | Xtensa 2 core LX6 |
| Speed | 80Mhz | 80Mhz | 160Mhz |
| SRAM | ~50KB | ~50KB | ~520KB |
| Flash | 1MB | 4MB | 4MB |
| Touch Sensor | No | No | Yes |
| SPI/I2C/I2S/UART | 2/1/2/2 | 2/1/2/2 | 4/2/2/2 |
| Temperature Sensor | No | No | Yes |
The decision of which board to use is fairly straight forward, if you need more I/O, processing power, or storage, you need to move to a more expensive board.
The tool chains for all the boards are identical. However, there are some critical differences in the settings required to setup the boards. The ESP32 MicroPython image also has different defaults on some values than the ESP8266 boards.
Next steps: Setting up the boards for MicroPython on Windows.
What you will need:
- ESP Board (one of the following)
- ESP32 ESP-32S Development Board ($10.99 on Amazon)
- ESP8266 NodeMCU LUA CP2102 ESP-12E ($6.50 on Amazon)
- Wemos D1 Mini Development Board ESP8285 V1.0.0 1MB ($4.94)
- Windows 10 PC
- micro USB to USB cable
- Putty or other terminal emulator (https://www.chiark.greenend.org.uk/~sgtatham/putty/)
- Python 3 (https://www.python.org/downloads/)
- esptool.py
Download and install Python 3 from here.
Make sure Python is in the path and environment variables are set if needed.
Detailed Python installation instructions for Windows can be found here.
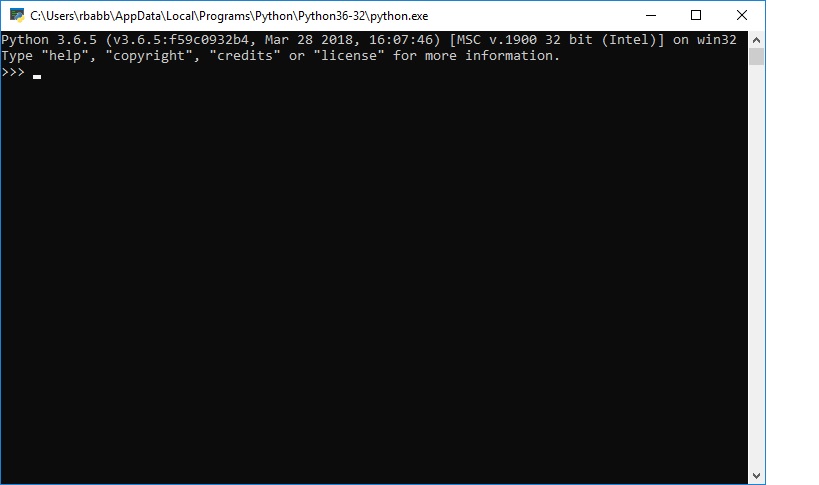
Verify Python by install right-clicking the start menu: Run->cmd
Enter python into the text box. You should see a command prompt and Python version information displayed.
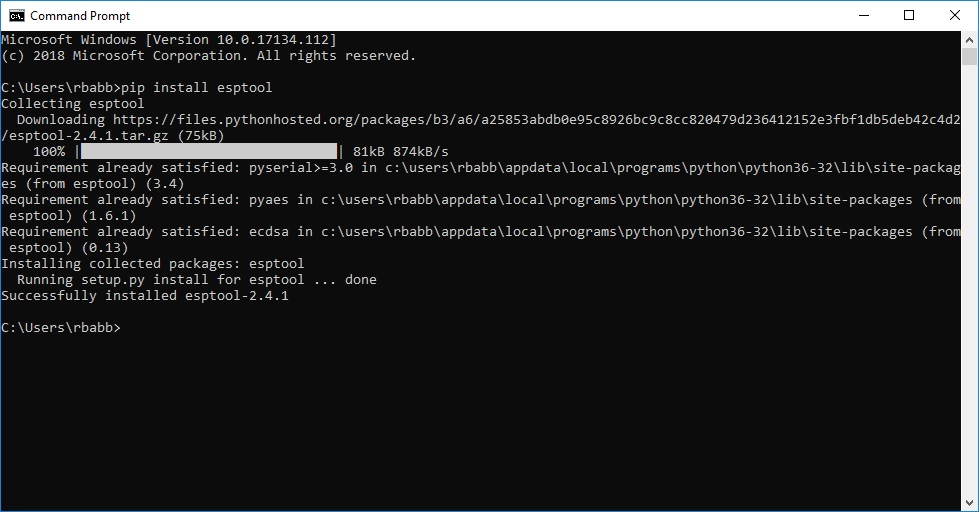
At the Windows Command Prompt type:
>pip install esptool
Verify esptool is working correctly by displaying it’s help:
>esptool.py --help

usage: esptool [-h] [--chip {auto,esp8266,esp32}] [--port PORT] [--baud BAUD]
[--before {default_reset,no_reset,no_reset_no_sync}]
[--after {hard_reset,soft_reset,no_reset}] [--no-stub]
[--trace] [--override-vddsdio [{1.8V,1.9V,OFF}]]
The esptool -h command will also display version and full usage information.
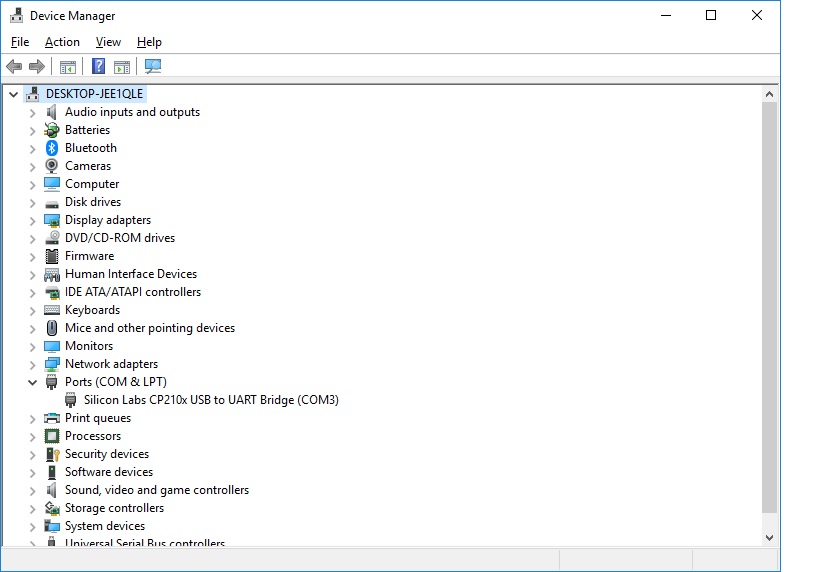
Now for some fun! Connect the ESP board to your PC using a USB cable.
You should see a new serial port in the device manager. The ESP board should appear as a COM port under “Ports”.
Dowload latest micropython stable version.
For ESP8285 and ESP8266 use: http://micropython.org/download#esp8266
For ESP32 use: http://micropython.org/download#esp32
Try to use the stable versions of the firmware. If you use a daily version of the firmware you will probably want to disable MicroPython debug output.
Next erase the flash memory on the ESP board. I like to specify the COM port as displayed in Device Manager.
esptool.py --port COM3 erase_flash
For the ESP32 you will need to specify the chip type as the default is the 8266.
You may need to press the flash button on some boards.
esptool.py --port COM3 --chip esp32 erase_flash
Write the new firmware to the ESP board:
esptool.py --port COM3 --baud 460800 write_flash --flash_size=detect 0 esp8266-xxxxxx-vX.Y.Z.bin
For Wemos D1 Mini Lite (ESP8285) you might need to lower the baud rate to 115200 and add the flash mode option:
>esptool.py --port COM4 --baud 115200 write_flash --flash_mode=dout --flash_size=detect 0 esp8266-xxxxxxxx-vX.Y.Z.bin
Here again the ESP32 requires a slightly different command to update the flash:
esptool.py --chip esp32 --port COM3 write_flash -z 0x1000 esp32-20180621-v1.9.4-189-g34344a41.bin
If the firmware was written successfully you will see output similar to the following:
esptool.py v2.4.0
Connecting....
Detecting chip type... ESP8266
Chip is ESP8285
Features: WiFi, Embedded Flash
MAC: 60:01:94:b0:f9:56
Uploading stub...
Running stub...
Stub running...
Configuring flash size...
Auto-detected Flash size: 1MB
Flash params set to 0x0320
Compressed 604872 bytes to 394893...
Wrote 604872 bytes (394893 compressed) at 0x00000000 in 35.2 seconds (effective 137.6 kbit/s)...
Hash of data verified.
Install Putty (Tera Term can be used as an alternative. However, I found setup more error prone.) I created and saved my settings as “MicroPython”. The next time you connect you can just load the correct settings.

Make sure the Serial settings are configured as no parity or flow control.

Connect to the board. You should now see a REPL prompt.
A quick check of the Python version will verify that REPL is working.
>>> import sys
>>> sys.version
'3.4.0'
Congratulations you now have a working MicroPython installation!
Further Reading:
https://docs.micropython.org/en/latest/esp8266/index.html
https://learn.adafruit.com/micropython-basics-how-to-load-micropython-on-a-board/overview
https://learn.adafruit.com/micropython-basics-what-is-micropython/overview
http://docs.python-guide.org/en/latest/intro/learning/