To complete our ESP on the cheap development environment we need some additional tools to turbocharge our productivity. I did a survey of available tools and found two that meet the criteria for Windows, Mac, and Linux cross platform support and have multiple ESP board vendor support. The first tool is a command line utility that makes it a breeze to perform file operations and run MicroPython programs on the ESP: Adafruit’s ampy. The second tool is the Pycharm IDE with the MicroPython plugin.
First, let’s take a look at “ampy”. “ampy” provides simple, but vital, ESP file system functionality, reliably. The usage information below spells it out clearly.
ampy - Adafruit MicroPython Tool

Ampy is a tool to control MicroPython boards over a serial connection.Using ampy you can manipulate files on the board's internal filesystem and even run scripts.

Options:
-p, --port PORT Name of serial port for connected board. Can optionally
specify with AMPY_PORT environment variable. [required]
-b, --baud BAUD Baud rate for the serial connection (default 115200).
Can optionally specify with AMPY_BAUD environment
variable.
-d, --delay DELAY Delay in seconds before entering RAW MODE (default 0).
Can optionally specify with AMPY_DELAY environment
variable.
--version Show the version and exit.
--help Show this message and exit.

Commands:
get           Retrieve a file from the board.
ls              List contents of a directory on the board.
mkdir     Create a directory on the board.
put          Put a file or folder and its contents on the...
reset       Perform soft reset/reboot of the board.
rm           Remove a file from the board.
rmdir     Forcefully remove a folder and all its...
run         Run a script and print its output
Installing ampy is also straightforward:
pip install adafruit-ampyTo upgrade to the latest version:
pip install adafruit-ampy --upgrade
The source and documentation for ampy is available in github:
https://github.com/adafruit/
“ampy”, it simply works. Nice.
At the opposite end of the power and complexity spectrum we have PyCharm. PyCharm is a full featured, professional, powerful, integrated development environment (IDE) for Python. The community edition is FREE. There is great documentation available for PyCharm so I am not going to discuss all its features and installation instructions here. I am just going to focus on the MicroPython plugin. The plugin is available on github: https://github.com/vlasovskikh/intellij-micropython
However, you can install and configure the Micropython plugin from within PyCharm. That’s what we are going to do.
Go to File->Settings->Plugins->Install JetBrains Plugins, search for MicroPython and install the plugin.

Next, go to File->Settings->Languages & Frameworks->MicroPython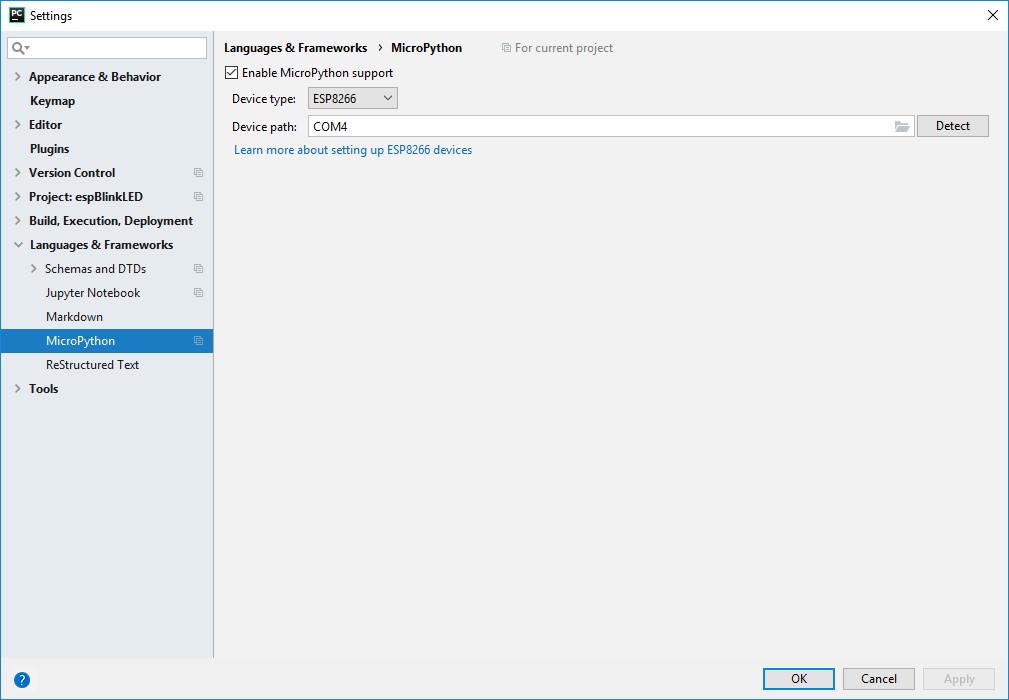
On Windows the plugin did not detect my WEMOS D1 MINI ESP8285. I had to enter the COM port manually. In my case COM4. Select your device type, the ESP8285 is equivalent to an ESP8266. Enable MicroPython support.
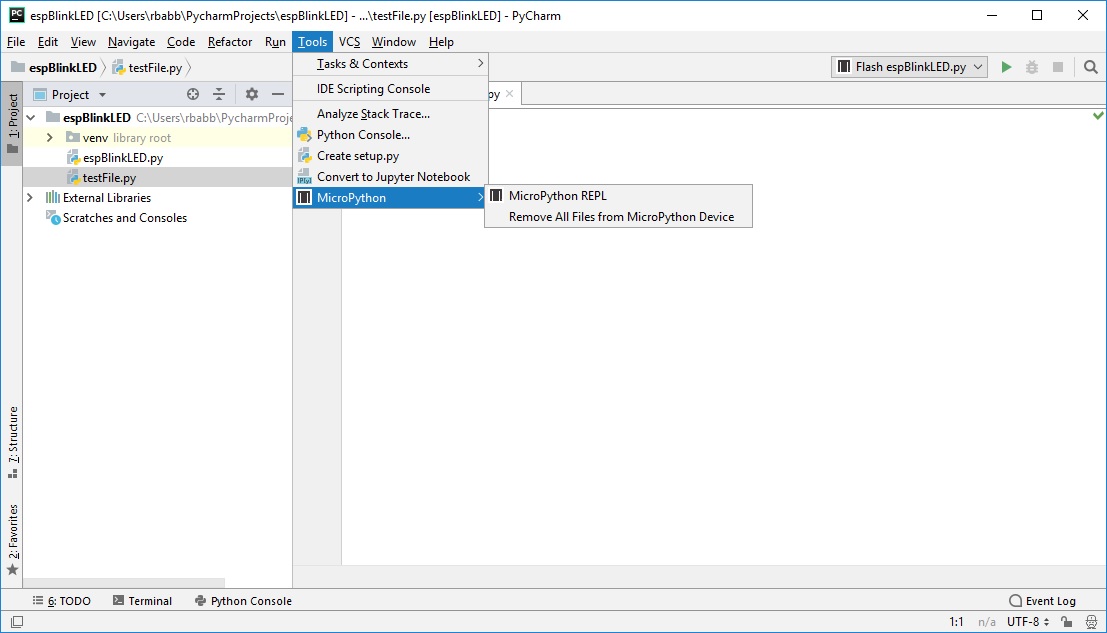
Plug in your ESP board if you haven’t already. We will bring up the ESP REPL to verify that our installation is working. Select Tools->MicroPython->MicroPython REPL.
I had to hit the reset button on my ESP to get it to work the first time. After that I didn’t have any issues. I found that none of the text editing keys worked in the REPL window, backspace, command recall, etc. So keep that in mind if you are planning to do extensive work in REPL. You may want to just open a terminal session (PuTTY on Windows).
To transfer files to the ESP you create a “flash” configuration, by right clicking on the file.
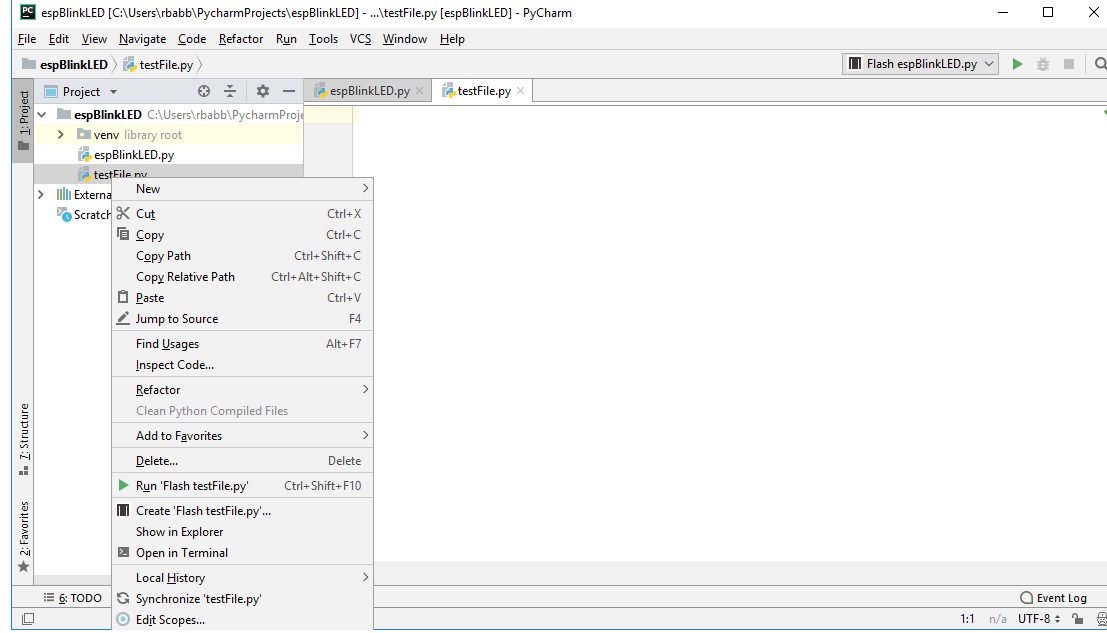
Once created it is a simple matter to run the configuration and copy the file to the ESP.
 You can now work directly with your ESP (or other) MicroPython board without having to leave PyCharm!
But wait, there is more! The MicroPython plugin also includes support for context aware completion and documentation (ctrl-Q), syntax checking, and type checking. Go PyCharm!